I am ready to load my first quilt on my new longarm machine!
To begin, I piece together some fabric fto make a wide backing, then trim it to make sure it is 'square'.
I notch the center of the top and bottom edge of the backing fabric, which is loaded on the frame WRONG SIDE UP.
Then I align the center notch on the bottom edge with the center marking on the canvas leader for the backing...the lower of the two front poles. I am using corsage pins to pin the backing to the canvas leader, putting my pins parallel to- and equidistant from- the edge.

Both sides should be the same distance from the center. I found it easier to pin the center first, then measure out to the place on the canvas leader where the side of the backing should be and pin that, then pin from the outside in towards the center; then repeat on the other side. This way, I am assured that each side will be the same. (I plan to make some new leaders with a tape measure sewn right on, but until then, I use my measuring tape to be sure I haven't pulled or stretched either side when pinning.)

Once the bottom edge of the backing is pinned across the entire edge, I smooth out the backing fabric and begin to roll it onto the pole, using my hands to smooth out from the center as I roll, so that the backing fabric will not twist or skew.

I stop rolling before the entire backing is rolled up, because not it is time to attach the other end of the backing fabric to the take-up roller at the back.
 Again, the center notch on the edge of the backing is matched and pinned to the center mark on the canvas leader of the take-up roller.

I measure out to the half-width place and pin the corner, then work back toward the center.


Once the entire upper edge of the backing fabric has been pinned to the canvas leader of the take-up roller, I can finish rolling the backing fabric on the lower front roller.

You can see the seams where I pieced the backing...I hope they don't pose a problem for me!
 Now I put the clamps (two on each side) on the sides of the backing fabric to hold it taut.

 Because my machine does NOT have a channel-lock feature, I use clamps from the garage to stabilize the machine on the carriage; clamping in front and behind one wheel will prevent the machine from moving forward or backward, yet it can still move side to side along the frame.

Not pretty but it works!
 Now I set the batting, which is cut to the same size as the backing, onto the backing. I align the top edge with the edge of the canvas leader and smooth out the batting.

Using the basting stitch, I baste the top edge of the batting in place...the 'channel locks' enable me to move perfectly straight to the side, giving me a straight line of stitching.
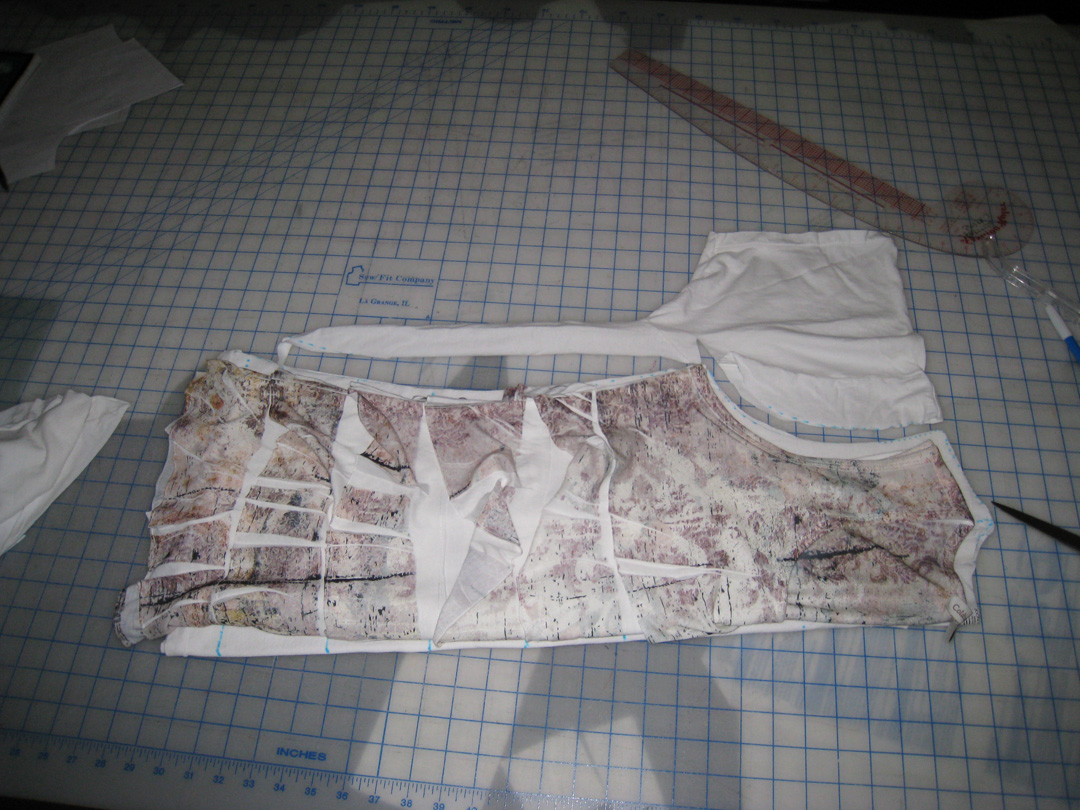
 Now it is time to load the quilt-top. The top and side edges of my quilt are 'square' but the lower edge is not (intentially). Because I need a square/straight edge to pin to the leader, I fold up a little bit of the lower edge to provide a straight edge and pin it into place.
 Then I lay this quilt top onto the batting, aligning the center of the quilt top with the center mark on the canvas leader on the take-up roller. I align the upper edge with that straight line of basting that I just did...and pin.
 I pin the entire upper edge, again, making sure to keep each side the same width...the same distance from center.
 Once the upper edge is pinned in place, I begin pinning the lower edge. Just as before, the center of the quilt is aligned with the center mark on the leader.

I use a pin placed vertically to indicate the width on each side...pinning the edge at the center then at the side and working my way back to center.
 Both upper and lower edges of the quilt are pinnned in place but they are not rolled up yet...the top is just kinda piled there.
 I move the clamps that I placed on the carriage, scooting them forward about 1/4" to allow the machine to again sew a straight line across, but this time, slightly farther forward from the roller. This enables me to baste the upper edge in place through all layers.
 I also baste down each side for a distance...that will have to be repeated each time the quilt is progressed on the frame.
 Now I am ready to begin quilting!
To begin, I piece together some fabric fto make a wide backing, then trim it to make sure it is 'square'.
I notch the center of the top and bottom edge of the backing fabric, which is loaded on the frame WRONG SIDE UP.
Then I align the center notch on the bottom edge with the center marking on the canvas leader for the backing...the lower of the two front poles. I am using corsage pins to pin the backing to the canvas leader, putting my pins parallel to- and equidistant from- the edge.

Both sides should be the same distance from the center. I found it easier to pin the center first, then measure out to the place on the canvas leader where the side of the backing should be and pin that, then pin from the outside in towards the center; then repeat on the other side. This way, I am assured that each side will be the same. (I plan to make some new leaders with a tape measure sewn right on, but until then, I use my measuring tape to be sure I haven't pulled or stretched either side when pinning.)

Once the bottom edge of the backing is pinned across the entire edge, I smooth out the backing fabric and begin to roll it onto the pole, using my hands to smooth out from the center as I roll, so that the backing fabric will not twist or skew.

I stop rolling before the entire backing is rolled up, because not it is time to attach the other end of the backing fabric to the take-up roller at the back.
 Again, the center notch on the edge of the backing is matched and pinned to the center mark on the canvas leader of the take-up roller.
I measure out to the half-width place and pin the corner, then work back toward the center.


Once the entire upper edge of the backing fabric has been pinned to the canvas leader of the take-up roller, I can finish rolling the backing fabric on the lower front roller.

You can see the seams where I pieced the backing...I hope they don't pose a problem for me!
 Now I put the clamps (two on each side) on the sides of the backing fabric to hold it taut.
 Because my machine does NOT have a channel-lock feature, I use clamps from the garage to stabilize the machine on the carriage; clamping in front and behind one wheel will prevent the machine from moving forward or backward, yet it can still move side to side along the frame.
Not pretty but it works!
 Now I set the batting, which is cut to the same size as the backing, onto the backing. I align the top edge with the edge of the canvas leader and smooth out the batting.
Using the basting stitch, I baste the top edge of the batting in place...the 'channel locks' enable me to move perfectly straight to the side, giving me a straight line of stitching.
 Now it is time to load the quilt-top. The top and side edges of my quilt are 'square' but the lower edge is not (intentially). Because I need a square/straight edge to pin to the leader, I fold up a little bit of the lower edge to provide a straight edge and pin it into place.
 Then I lay this quilt top onto the batting, aligning the center of the quilt top with the center mark on the canvas leader on the take-up roller. I align the upper edge with that straight line of basting that I just did...and pin.
 I pin the entire upper edge, again, making sure to keep each side the same width...the same distance from center.
 Once the upper edge is pinned in place, I begin pinning the lower edge. Just as before, the center of the quilt is aligned with the center mark on the leader.
I use a pin placed vertically to indicate the width on each side...pinning the edge at the center then at the side and working my way back to center.
 Both upper and lower edges of the quilt are pinnned in place but they are not rolled up yet...the top is just kinda piled there.
 I move the clamps that I placed on the carriage, scooting them forward about 1/4" to allow the machine to again sew a straight line across, but this time, slightly farther forward from the roller. This enables me to baste the upper edge in place through all layers.
 I also baste down each side for a distance...that will have to be repeated each time the quilt is progressed on the frame.
 Now I am ready to begin quilting!