Saturday, June 12, 2010

The Red Floral KK knit top

Here is my latest knit top:


This pattern was made similarly to the black and white one, except this time I didn't lower the front shoulder angle.

I DID reduce both the CENTER FRONT LENGTH and the FRONT SHOULDER SLOPE measurements by 0.5", though, because I knew the knit fabric would stretch to accomodate my body's curves in front...and using a shorter CFL produces a smaller bust dart, so there is less dart to 'get rid of' from the start.

I also INCREASED my BUST measurement from 41.5" to 42"...not much, but this also made the bust dart smaller, so there was less dart to eliminate in the process of going 'dartless'.


Also, I INCREASED the SHOULDER LENGTH measurement in my chart for this one...because when I rotate that remaining little dart closed, it increases the width of the neck opening on the front pattern. By increasing the SHL I have created a more-narrow front neck to start with, so that when I rotate the little dart closed, the resulting front neck width matches the back neck width.


I DID NOT scale this pattern at all...I used it as drafted, with zero bust ease. In hindsight, I *should* have used MORE hip ease, then scaled it smaller, because I had increased both the shoulder and bust measurements! duh. But it is very wearable...the ladies in my sewing guild liked the extra ease. BTW, the back neck depth is 0.75".


There is a bit of 'drapery' under the arms, both in front and back. Part of this is the excess bust ease, but also, part of it is due to the shoulder angles being the same as for WOVEN fabrics. I should have lowered the shoulder angle after all! I have decided that for next time, I will lower the back shoulder angle by .375" and will lower the front shoulder angle by .75"...twice as much in front as in back. You can see by the picture below that when I pinch the shoulders UP, the drapery is lessened.


So, I *think* I have finally figured out how to get a good dartless pattern using my Patternmaster Boutique software! Yes, it takes some manipulation, but not alot...and certainly much less manipulations that I have to go through to alter a commercial pattern! And it only took 11 years to figure it out! ;)

Oh, and the 'KK' in the title stands for Klassy Katz...the fabric store where this fabric was purchased!
Here are my drafting choices:
Style Name: 100520_4_dartless_tiny_dart
Date: 5/20/2010
Last Update: April 1, 2010
Chart: Trish 050710_4Drtls_tinydt

Garment Type: Blouse
Style: Blouse
Closure: Front Zipper
Front Neckline: Scoop
Back Neckline: Jewel
Hemline Sweep: Straight
Hemline Shape: Straight
Front Darts: Side
Back Darts: No Darts
Sideseam Shape: Fitted

Front Waist Darts: 2
Back Waist Darts: 1

Front Neckline Depth: 4
Back Neckline Depth: 0.75
Neckline Width: 1
Neckline Point: 0

Armhole Depth: 0
Dart Override: -0.625

Side/Arm Point: -1
Side/Waist Point: 0
Side/Hip Point: 0

Cf/Extension: 0
Cb/Extension: 0

Shoulder Pad: 0
Shoulder Point: 0

Finished Cb/Hem Length: 24
Hip Depth: 8

Bust Pt Vertical: 10.25
Bust Pt Horizontal: 5
Upper Front Dart Length: 1
Upper Back Dart Length: 1
Lower Front Dart Length: 4.75
Lower Back Dart Length: 4.75
Back Shoulder Dart Length: 3


Sleeve Style: Set In
Sleeve Underarm Seam: Tapered
Sleeve Hemline Shape: Straight
Sleeve Length: Short
Sleeve Cap Ease: 0.35
Sleeve Underarm Length: 2
Sleeve Overarm Length: 7.849
Sleeve Hem Circumference: 15
Sleeve Elbow Depth: 8
Sleeve Elbow Circum.: 10
Sleeve Cap Height Adj: -0.75
Front Armhole Shape Down: -0.3 clicks
Back Armhole Shape Right: 0.2 clicks


Seam Allowance: 0.375
Hem Allowance: 2
Facing Width: 2

Chest Ease: 0
Waist Ease: 0
Hip Ease: 1


Body Measurements

Chest Circumference: 42******increased by 0.5”
Back Shoulder Width: 15.75
Neck Circumference: 13
Natural Waist: 35
Hip Circumference: 41
Crotch Length: 29
Height: 66
Weight: 98:)
Bra Cup Size: D
Center Front Length: 14.5***reduced by 0.5”
Front Shoulder Width: 15
Front Shoulder Slope: 18***reduced by 0.5”
Shoulder Length: 5.375**********increased by 0.375”
Center Back Length: 16.5
Back Shoulder Slope: 17.875
Bicep Circumference: 12

Notes:
duplicating/improving NOVeDrtls6 CSL2

DARTLESS 4 has 42 bust and longer SHL...which makes Fneck .5" narrower than Bneck...so rotating bu dart closed will equalize the neck widths

Tuesday, June 8, 2010

As happens every summer, I am once again sewing DARTLESS knit tops. I am once again trying to create the perfect dartless pattern, which will create the perfect dartless top. Again.

This one is very similar to a pattern I created a few years ago which pretty closely duplicates a Coldwater Creek short-sleeved knit top.

Basically, the pattern's front shoulder point is dropped severely, as if the side bust dart was scooted upward and removed at the shoulder! Of course, that is NOT what I did. No, I spent hours (days? weeks? years?) figuring out which numbers to change so that the program would create this shape for me!

The RED pattern (below) is the pattern for the above top. The blue/green patterns are my basic block, using similar drafting choices as were used for this one...for example, with the bust dart in the front armhole. You can see how the RED pattern has a very dropped front shoulder, yet the back shoulder remains unchanged. To prevent that front armhole from being WAY too small, I used the DART OVERRIDE tool to put some of the bust dart into the front armhole. As you can see, there is not much change in the sleeve, which means there is not much difference in the armhole lengths between these two patterns.


Below, the same two patterns are aligned at the hem/waist. As you can see, the front pattern is shorter on the RED one than on the basic block...this is because I reduced the CENTER FRONT LENGTH measurement to account for the stretch of the fabric.


I know that the front of my body will stretch the knit fabric more than the back of my body, so I can get more length from a knit fabric than I would get from the same cut-length of a woven fabric. So I can reduce the length of the front pattern to start with.
Also, as mentioned before, to lower that front shoulder point I reduced the FRONT SHOULDER SLOPE MEASUREMENT even more than I reduced the CFL...to increase the angle of the front shoulder. This is to prevent 'sagging' of the knit on the side of my body.
But as you may have noticed, this pattern is NOT dartless. There is a little dart there in the front armhole. Yet, I want a DARTLESS pattern! So the rest of the patternmaking was done in the PATTERN EDITOR.
I simply extended the dart to the CF line then rotated out HALF of the dart width. Then I drew a new CF line to connect neck and hem. The remaining dart will be eased to the sleeve...or ignored! This dart-rotation DOES remove a little width from the front pattern at bust level. And if you look back up at the top two pattern images, you might notice that the RED pattern is narrower at bust level than the basic block to start with! That is because I also reduced the BUST CIRCUMFERENCE measurement by 1.5". As it turns out, that was too much, especially when combined with this alteration which also reduces the width at bust level. But the top is wearable, even if the fabric is not gorgeous.


Speaking of not-gorgeous fabric, I am thinking I will over-dye this, and maybe print/paint on it, too. I mean, really, with my brown hair turning grey, I really don't need to wear a little black and white print that kinda reads as grey! Actually, this is not as bad on me as some shades of brown are these days!


This method DOES create a wearable dartless knit top and, as I said, it is VERY similar to the size, shape and fit of Coldwater Creek's knit top (size L). But it DOES ride backward some (just like the CWC tops) and I would like to eliminate that phenomenon.
I have created and sewn another knit top since this one, and I changed the way I treated the shoulder angles...stay tuned!

FYI, here are the drafing specs:

Style Name: dartless_with_tiny_dart
Date: 6/8/2010
Last Update: April 1, 2010
Chart: Trish 050710_2Drtls_tinydt
Garment Type: Blouse
Style: Blouse
Closure: No Closure
Front Neckline: Scoop
Back Neckline: Jewel
Hemline Sweep: Straight
Hemline Shape: Straight
Front Darts: Armscye
Back Darts: No Darts
Sideseam Shape: Fitted
Front Waist Darts: 0
Back Waist Darts: 0
Front Neckline Depth: 2.5
Back Neckline Depth: 0.75
Neckline Width: 0.625
Neckline Point: 0
Front Neckline Shape Up: 0.4 clicks
Front Neckline Shape Right: -0.4 clicks
Armhole Depth: -0.5
Dart Override: -0.625
Side/Arm Point: -1
Side/Waist Point: 0
Side/Hip Point: 0
Cf/Extension: 0.5
Cb/Extension: 0
Shoulder Pad: 0
Shoulder Point: 0
Finished Cb/Hem Length: 24
Hip Depth: 8
Bust Pt Vertical: 10.25
Bust Pt Horizontal: 5
Upper Front Dart Length: 1
Upper Back Dart Length: 1
Lower Front Dart Length: 4.75
Lower Back Dart Length: 4.75
Back Shoulder Dart Length: 3

Sleeve Style: Set In
Sleeve Underarm Seam: Tapered
Sleeve Hemline Shape: Straight
Sleeve Length: Short
Sleeve Cap Ease: 0.19
Sleeve Underarm Length: 2
Sleeve Overarm Length: 7.182
Sleeve Hem Circumference: 14
Sleeve Elbow Depth: 8
Sleeve Elbow Circum.: 10
Sleeve Cap Height Adj: -0.75
Front Armhole Shape Down: -1.8 clicks
Front Armhole Shape Left: 0.3 clicks
Back Armhole Shape Down: -0.5 clicks

Seam Allowance: 0.625
Hem Allowance: 2
Facing Width: 2
Chest Ease: 0
Waist Ease: 0
Hip Ease: 0

Body Measurements
Chest Circumference: 40
Back Shoulder Width: 15.75
Neck Circumference: 13
Natural Waist: 34
Hip Circumference: 42
Crotch Length: 29
Height: 66
Weight:
Bra Cup Size: D
Center Front Length: 14.5
Front Shoulder Width: 15
Front Shoulder Slope: 17
Shoulder Length: 5.125
Center Back Length: 16.5
Back Shoulder Slope: 17.875
Bicep Circumference: 12

Friday, June 4, 2010

Silly Chenille

After seeing this technic demomstrated again at the April meeting of a local quilt guild, I decided to play with it at home. 'Faux Chenille' is basically mulitiple layers of fabric that are stacked, then channel-quilted on the diagonal (bias). The layers are then slashed between the rows of stitching, leaving only the bottom layer intack. Because the fabrics are cut on the bias, they will ripple, but usually not ravel too badly. This creates a 'chenille' effect.


For my sample, I chose a dark purple cotton for the bottom layer. I stacked several layers of rayon challis and a layer of what is probably polyester chiffon, followed by a green cotton and finally, a snake-printed polyester organza (or chiffon...I am never sure of these things!). I drew a line to guide my first row of stitching and becan.

Then I slashed between the rows with scissors. Now, there is a really cool tool that makes cutting this a cinch...but I didn't have it. I thought, "This is only a small sample...it will be fine." But boy! did my hand ache after all the cutting!
To make it more interesting, I cut the piece into quarters and rotated them then stitched them back together with a multi-stitch zigzag. Then the whole thing was washed and dried to make it 'bloom'.

Meanwhile, I had begun creating some silly flowers using various interesting fabrics from my stash...a velvet, a lame' (don't know how to get the ' in the right place on my keyboard!) and another scrap from my friend, Etta.
But the flowers were too large...or rather, the background was too small for the flowers!

So I layered up some more fabrics and began stitching again...this time, creating a V shape with my stitching. This way, I could get more interest without having to cut and rotate.


Once the stithcing was completed and this piece was washed and dried to make it 'bloom', I cut it into strips and added them around the outside edges of the first piece.


Then I began to work on the stems and leaves. I cut bias strips from a dark green polished cotton for the stems, and the leaves were cut (free-hand) from a sample swatch of upholstery fabric.


I roughly pinned the pieces in place until I decided what to put where...then I removed the pieces and added the stems, one at a time. The leaves were satin-stitched around the outside edges, as were the flowers.


Then I cut and sewed some black felt around the outside. That is as far as I got...it isn't finished! The felt isn't even cut well...just kinda whacked. But I will finish it eventually...


Friday, May 7, 2010

Catching up...Show ~n~ Tell!

I can't believe it is taking me so long to catch up on my life! April is just a blur...

It is already MAY and I still haven't shared my loot from the AQS Quilt Show in Paducah!

Ok, here goes:

I bought some books and special rulers. This book-- http://creativecurves.com/curvesaheadb.htm --and these rulers-- http://creativecurves.com/cc_mruler.htm --are to do some curved piecing. The rulers look like a 'hood' pattern piece to me! Vanessa, my companion at the show, already had the oval rulers and stopped in at the booth to ask how to use them (as she had forgotten). As I watched the creators explain to her how to use her rulers, I decided that *I* wanted some, too! Of course... :) So I bought the curved (radius) rulers, so as not to duplicate the ones Vanessa had...and I got a book as well so that I could remember WHY I had wanted these and what I planned to do with them!


I also bought this book from Elisa's Backporch...the Crazy Curves book and the 7" Crazy curves templates, as well as the 3½" Small Paths Template. She was in a brick warehouse across from the museum...and had laryngitis! http://www.backporchdesign.com/backporch.htm


I bought these fat quarters to go with a scrap quilt that I have started. Because I am not sure that I have enough scraps for an entire quilt, I bought more fat quarters in those colors to mix and match with the fabrics I already have. I might end up with WAY more than I need!


I got these fabrics just because I like them! some of the greens might go in the scrap quilt with the fabrics above...that one is a block of the month quilt...but they were to lovely to pass up! The bird print is like from an encyclopedia of birds!


I had decided to collect animal prints for a quilt, and so in each shop or booth, I looked to see if they had any and picked them up where I found them. Well, I now have SEVENTEEN animal prints—all different! Amazing that I got no duplications (of prints, not animals!). I hadn’t realized I had found quite that many! I am not exactly sure what I will make with them...perhaps a New York Beauty quilt?...but I have them now! :)


These were a couple of intersting Japanese fabrics that I couldn't pass up, along with a leaf and vine trim that was also calling my name.


The black roll is CHALK BOARD fabric! One can write on it with chalk and erase it, just like on a blackboard! I will make a small quilt for my neice with this.

The CHARM PACKS are Kaffe Fasset fabrics that I picked up at Hancock's of Paducah. They will make something interesting, but I am not sure what just yet!


I looked at several quilting aids at the show and the one I decided to buy is this one, the Fabulous Fabric Glide... http://cgi.ebay.com/FABULOUS-FABRIC-GLIDE-FREE-MOTION-QUILTING-GUIDE-/270544865325 ...two semi-hoops to use when doing free-motion quilting (but *not* on my HandiQuilter...on my regular machine, where I would be moving the fabric). These help grip the fabric and give you something to hold on to, rather than relying on finger tips and friction. This 'hoop' was taller than some of the other hoops...some of which were stacked 3 tall in order to better get a grip on them!


The underside has tiny little rubber grippers that will hold on...not foam rubber that will eventually wear out and crumble.


I also bought quite an assortment of 'stuff'...wonderful NECESSARY stuff! :) Like these blue foam blocks...they can be heated and molded around small items and then they become a rubber stamp! Just heat them back up to remove the molded imprint...and remold them at will!

The rubbing plates of insects and leaves are to be used with those paintsticks that I still haven't used, as could be both of the animal print stencils. And the tjanting tool is for batik...the soda ash is to prepare fabric for dying! See? All very necessary items!


These BAREROOTS things are actually kits for candle mats. I just thought they were cute! I got the recommended needles for hand sewing them, because that is polite...but I might do them by machine! I do love power tools, you know... :) The disappearing thread has already vanished...it is somewhere in my sewing room, I am sure!


I picked up several patterns that I couldn't live without...one in particular is for a purse insert. That just sounds like a good idea!


Who knows when I will find the time to do any of this...let alone ALL of it!
Currently, I have been working on creating a pattern for a new dartless top.
WHAT? you say.
Yep, every so often I feel the need for a little self-torture, so I go at it again! :)
And to make matters even MORE interesting, I decided I needed a new pants pattern (as my old one is now a bit tight across the middle! 8-0
I'll let ya know how that goes!

Sunday, April 25, 2010

Back from Paducah

I'm baaaack! And I had a great time! This was my first visit to the quilt show in Paducah, and I hope it won't be my last. Paducah is a wonderful little town. I was quite impressed with the area around the convention center near the river...many quaint little shops and restaurants to visit, and everything was so pretty, with flowers blooming and all the landscaping looking quite well-attended! It felt 'safe'. Everyone we met was so helpful and friendly...nice.

My birthday fell during the days I was in Paducah, so my friends all helped to make it special. In addition to Vanessa and Marilyn (above), at the show, we met up with Etta (the one I went to Houston with last fall) and Charla and several of their friends and we all (10 of us) had dinner on my birthday at a wonderful little place called Patti's...
http://www.pattis-settlement.com/

Patti's serves bread baked in Terra cotta flower pots, along with strawberry butter! Yum! Plus, 2" thick pork chops are their specialty...although I got the salmon instead. There are white Christmas lights nestled with silk flowers and greenery along the ceilings and walls...I would hate to have to clean it, but it provided nice atmosphere!...hardwood floors and lace curtains, old oak furniture and antiques.

The waiters brought me a cherry cheesecake tart with a candle and everyone sang Happy Birthday to me! Ordinarily, I wouldn't have wanted that public singing, but what the heck...no one there knew me!...it was fun. The food was wonderful as was the company and the environment. It was a nice birthday!


The girls surprised me with this engagement calendar that everyone had signed...how cool!


This is what the inside looks like...a quilt picture on the left and seven days on the right...nice!


I'll take some pictures of my 'loot', too, to play show~n~tell!

Tuesday, April 20, 2010

No puzzle swap just yet...

Well, the puzzle swap had to be postponed. A family emergency has kept me out of town for the better parts of the last two weeks, so everyone agreed to wait until May to swap our puzzles. I'll be sure to post pictures when we do swap, though!

For now, I am planning a visit to the quilt show in Paducah, KY. I have never been before and am really looking forward to it! I don't know exactly what to expect...but I am open to being amazed! :)

More later...

Sunday, April 11, 2010

Puzzle swap

After visiting this blog, I suggested to my Fiber Arts group that some of us might wish to do a similar swap. Well, surprise, surprise...Fourteen ladies wanted to participate!


We set the first Monday of April as the day of the swap...this was decided back in January.
However, the community center where we meet decided to close that Monday (MLK day) so we will swap these tomorrow...on the 12th of April.


I finished my pieces in March, but needed to keep them secret until now!

Remember when the Carol Duvall Show was on HGTV? She had a variety of guests demonstrating a variety of crafts and usually there was SOMETHING on each show that I enjoyed and wanted to try.

One of these demonstrations was origami using fabric.

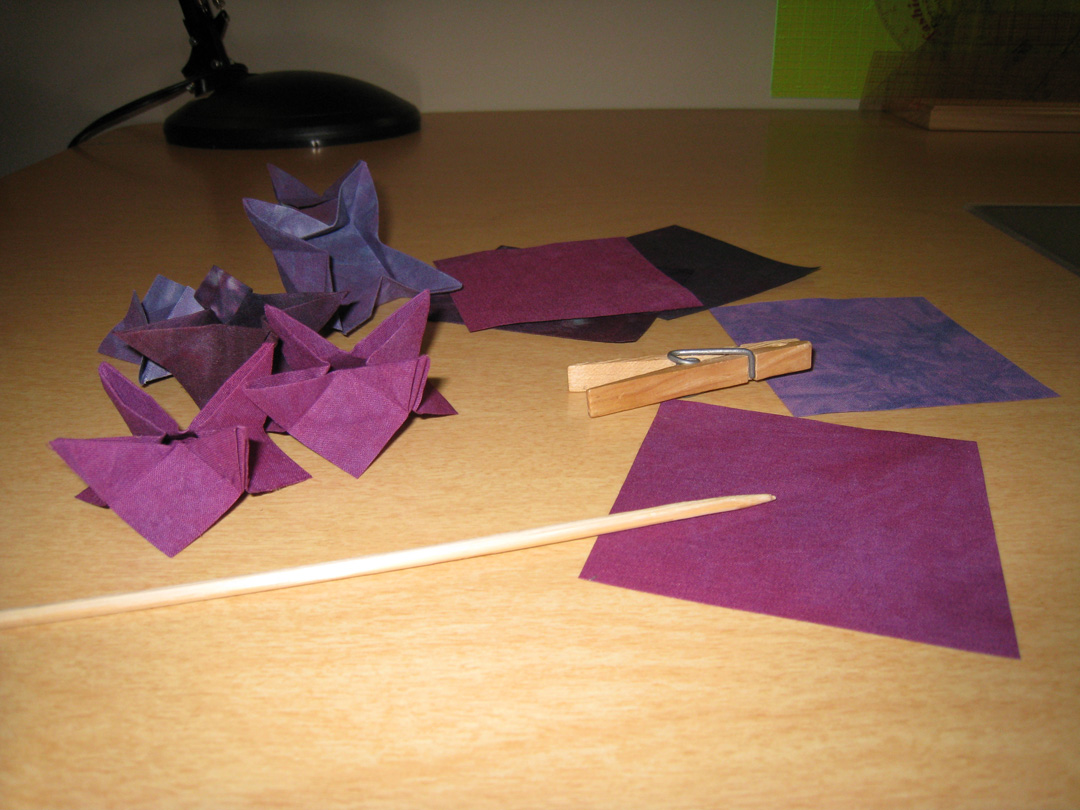
The guest, Rebecca Wat, had published a book called Fantastic Fabric Folding and she demonstrated this one little flower. I followed along and folded a flower using a piece of paper.

I have kept it all these years. I decided THAT would be the theme of my puzzle pieces!


The first few flowers I made used the light pink fabric, and I used the iron to set the creases...but I decided the fabric would perform much better if it was starched...and my fingers would appreciate not getting burned! So I mixed up some boiled starch and drenched the remaining fabrics then ironed them flat and stiff.

Then I cut the fabric into squares. I wasn't particular about the size of the squares, making a variety to fit my scraps. After all, there weren't going to be sewn together, so the squares could be different sizes.

I folded the purples, pinks and magenta squares back and forth, just as I had done with the paper 'sample flower' I had saved all these years. It worked in fabric, too!

Next I rounded up some of the blue/green scraps of hand-dyed fabric left over from "Shoulda Putta Frog on it" (a.k.a. the Blue River Quilt) as well as some additional fabrics to use for the background.


Once the flowers were made, I attached the blue and green scraps 'log-cabin style' to the flower center. The object of the game was to get a background large enough to fit the puzzle piece template onto.


I layered these pieces onto some off-white felt and stitched the background...mostly stippling, although I experimented with other stitch patterns at first (the stippling looked best!). Then I used my puzzle template to mark these pieces. I had downloaded the puzzle piece used by this blog and shared it with the other participants in my group. One of the ladies in my group had laminated this and cut the pieces apart to provide each of us with a laminated puzzle piece to use as a template for drawing around...a nice help! Then I cut out the pieces using scissors. More than once I thought how nice a die-cut machine would be!


To give them a nice backing, I used Wonder Under to attach TWO layers of sew-in interfacing, then cut them into squares and painted them with acrylic paint. Once dry, I used the template to mark and cut these into puzzle shapes also. These were them paired with the pieced puzzles...I glue-basted them together, then stitched around the edges with variegated thread.

This is my final product!


I made 17 pieces, although I only needed 14. I wanted to have a few extra in case I messed up!


The hardest part was cutting these out. That is why I cut the top and backing separately...I had tried basting the top to the backing BEFORE cutting on 3 of them and was SO glad that I stopped to test the cutting before sewing them ALL together! It was easier to cut twice as many thinner ones than half as many thicker ones!


I have a variety of colors and flower sizes. The hand-dyed fabrics make nice things! I think I will have to start dying fabric...it is so much fun to use this stuff!


The tabs don't all interlock, but that is to be expected. Even if they did, once swapped, will mine interlock with those of others? Who knows! I will show you the result of the swap later...check back!


Free Hit Counter